Watching the TT
Photographing Road Racing
How to photograph the TT: reading a corner, shutter speeds and panning, the best vantage points for pictures, and staying safe behind the fences.
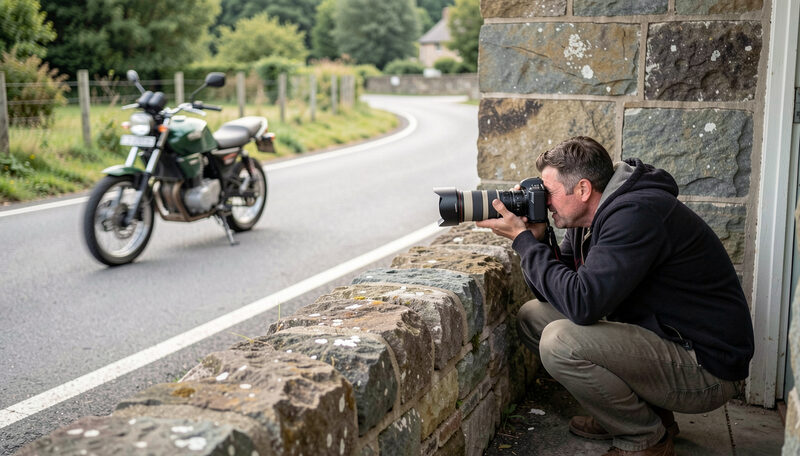
Road racing is one of the hardest subjects in motorsport photography, and the TT is the hardest of the road races. There is no run-off, so the photographer stands behind a wall or a hedge at the edge of the road, often within a few metres of the racing line. The machines arrive at speed, pass in a fraction of a second, and are gone. This guide covers how to read a corner, what settings help, where the best pictures are found, and how to work safely.
Reading a corner before the racing starts
The first job is not technical, it is geographical. A photographer needs to know which way the road turns, where the racing line runs, where a machine will be at its lowest and highest, and what the background will be. A corner should be studied during a quiet moment, before the road closes, so that the shot is planned rather than improvised.
The best positions usually share two qualities: a clear line of sight to the approach, and a background that separates the machine from the road. An outside line on a corner shows the lean and the full shape of the bike. An exit position shows the drive and the rear tyre. A low position shows the machine against the sky or the hedge rather than against tarmac. Each choice trades one kind of picture for another.
What different corners offer
The course is generous with variety, and each part of it rewards a different approach. The drop at Bray Hill gives speed, crowd and a steep change of level, and it is where a photograph can show the machine unweighted over the crest. The bridge at Ballaugh gives the jump, with the village as a backdrop. The Ramsey Hairpin gives slow control and body position, with time to compose. The Gooseneck gives linked bends on a gradient. The descent past Creg-ny-Baa gives a long view of the road and the sea.
A photographer who wants a single strong image should choose one corner and work it properly rather than moving constantly. The light changes through the day, and a position that is poor in the morning can be excellent in the afternoon.
Shutter speed and the two kinds of picture
There are two basic approaches to a moving motorcycle, and they produce different pictures. The first is to freeze the action with a fast shutter speed, often 1/1000 of a second or faster, which keeps the machine and rider sharp. The second is to pan with the machine at a slower shutter speed, often between about 1/125 and 1/500 of a second, which keeps the rider sharp while blurring the road and background to convey speed.
Panning is a skill rather than a setting. It requires a smooth rotation of the body, a steady hand and a willingness to discard most frames. A low shutter speed that produces one good frame in twenty is often more satisfying than a fast shutter speed that produces twenty sharp but static ones. Most photographers carry both approaches and choose between them depending on the corner.
Focus, lenses and light
A long lens is useful for compressing the scene and isolating a machine against a background, but at the TT the distances are short and a medium telephoto is often enough. A wide angle used close to the road can show the speed of the pass and the proximity of the wall, which is part of the character of road racing. Continuous autofocus with a wide focus area suits the approach shots, while a single focus point is often better for a planned position on a corner.
Light on the Isle of Man is frequently soft and grey, which suits the subject. Bright sun creates hard shadows and blown highlights on fairings, and the middle of the day is often the least rewarding. Early morning and late afternoon sessions, when the sun is low, give the best modelling on the machine and the rider.
Staying safe and staying welcome
Safety rules come before pictures. A photographer stands behind the barriers at all times, never on the road, and never somewhere a marshal has asked them to move. A long lens can make a rider appear further away than they are, and it is easy to step back into a position that is unsafe while framing a shot. The correct habit is to settle on a position, check it against the barriers, and then shoot without moving the feet.
Etiquette matters too. Spectators have as much right to the view as photographers, and a tripod or a bag left in a gap between people will not make friends. The event depends on the goodwill of the island, and a photographer who blocks a pavement or a gateway is part of the problem rather than the record of it.
Putting a visit together
A photographer planning a TT visit should pick two or three corners rather than trying to cover the course. The start area gives the crowd and the drop at Bray Hill. The north west gives the jump at Ballaugh and the Sulby straight. The mountain gives the hairpin, the Gooseneck and the descent to Creg-ny-Baa. Together they cover most of the pictures a visitor might want.
Practical notes on access, closures and timing are in the guide to where to watch the TT, and the full order of the course is in the index of named corners of the Mountain Course. The guide to watching the TT explains the shape of the fortnight. The circuit itself, including the absence of run-off areas, is documented at Wikipedia.
The best advice for a first attempt is to choose one corner, learn it in the quiet before the road closes, and spend a session on it. Road racing rewards patience more than equipment, and the pictures that matter are usually the ones that were planned in advance.